Showing posts with label DIY. Show all posts

Friday, October 28, 2011

This Week

I'm afraid I don't like my days off.
I start off the day with so many anticipations of what I'm going to get done.
But, when I'm at home, all I want to do is lounge and eat and nap and watch movies.
When I go to a "workplace" I'm busy and I loose myself.

Oh what work does for one's soul.  
Lazy days aren't good for me.
The only thing I really do love about days off is sleeping in.

But even then, I sleep in till 8.
The one thing that is wonderful though,
Is not having to set an alarm.
Knowing that nothing else will wake me up up but my own stirring.


Here's things I should start doing:

1) Cook more.  I do live with the parentals, so this one is tricky.  But oh how I love cooking and inventing.

This one would be fun for this time of year.
Go HERE to check out this wonderful blog full of fun and inventive recipes


Does this not look delicious?
Go HERE

Shut up, I have to try this...
Imagine a pie with this lace topping for a crust.
Go HERE

2) Craft more.  I need to relish my time off!  And not try and get so many "serious" things done. 


3) Work out.  Let's be honest, I haven't for like 3 months.  This is really sad......


Friday, September 16, 2011

Wish me luck


I'm doing it. I'm attempting to do a goal off my bucket list. I'm going to reupholster this fabulous chair.

I'll keep you updated.

Wednesday, September 7, 2011

Wednesday's Craft

Here's tonights craft: a hot pad.  My friend is getting married Friday and I need a present.  And what do you know?  I have a free night...


So here's a simple idea for you to do on your night off.  My plan is to give it with a bundt cake pan.  Why?  Because a bundt cake sounded good tonight.  It was super easy and I didn't follow a pattern.  I thought I'd share my idea with the world! (PS, my picture quality sucks because I took them with my iPhone.)


Step 1) Cut 2 coordinating 8x8 inch squares.  Also, cut one 7x7 inch thin quilting padding square.

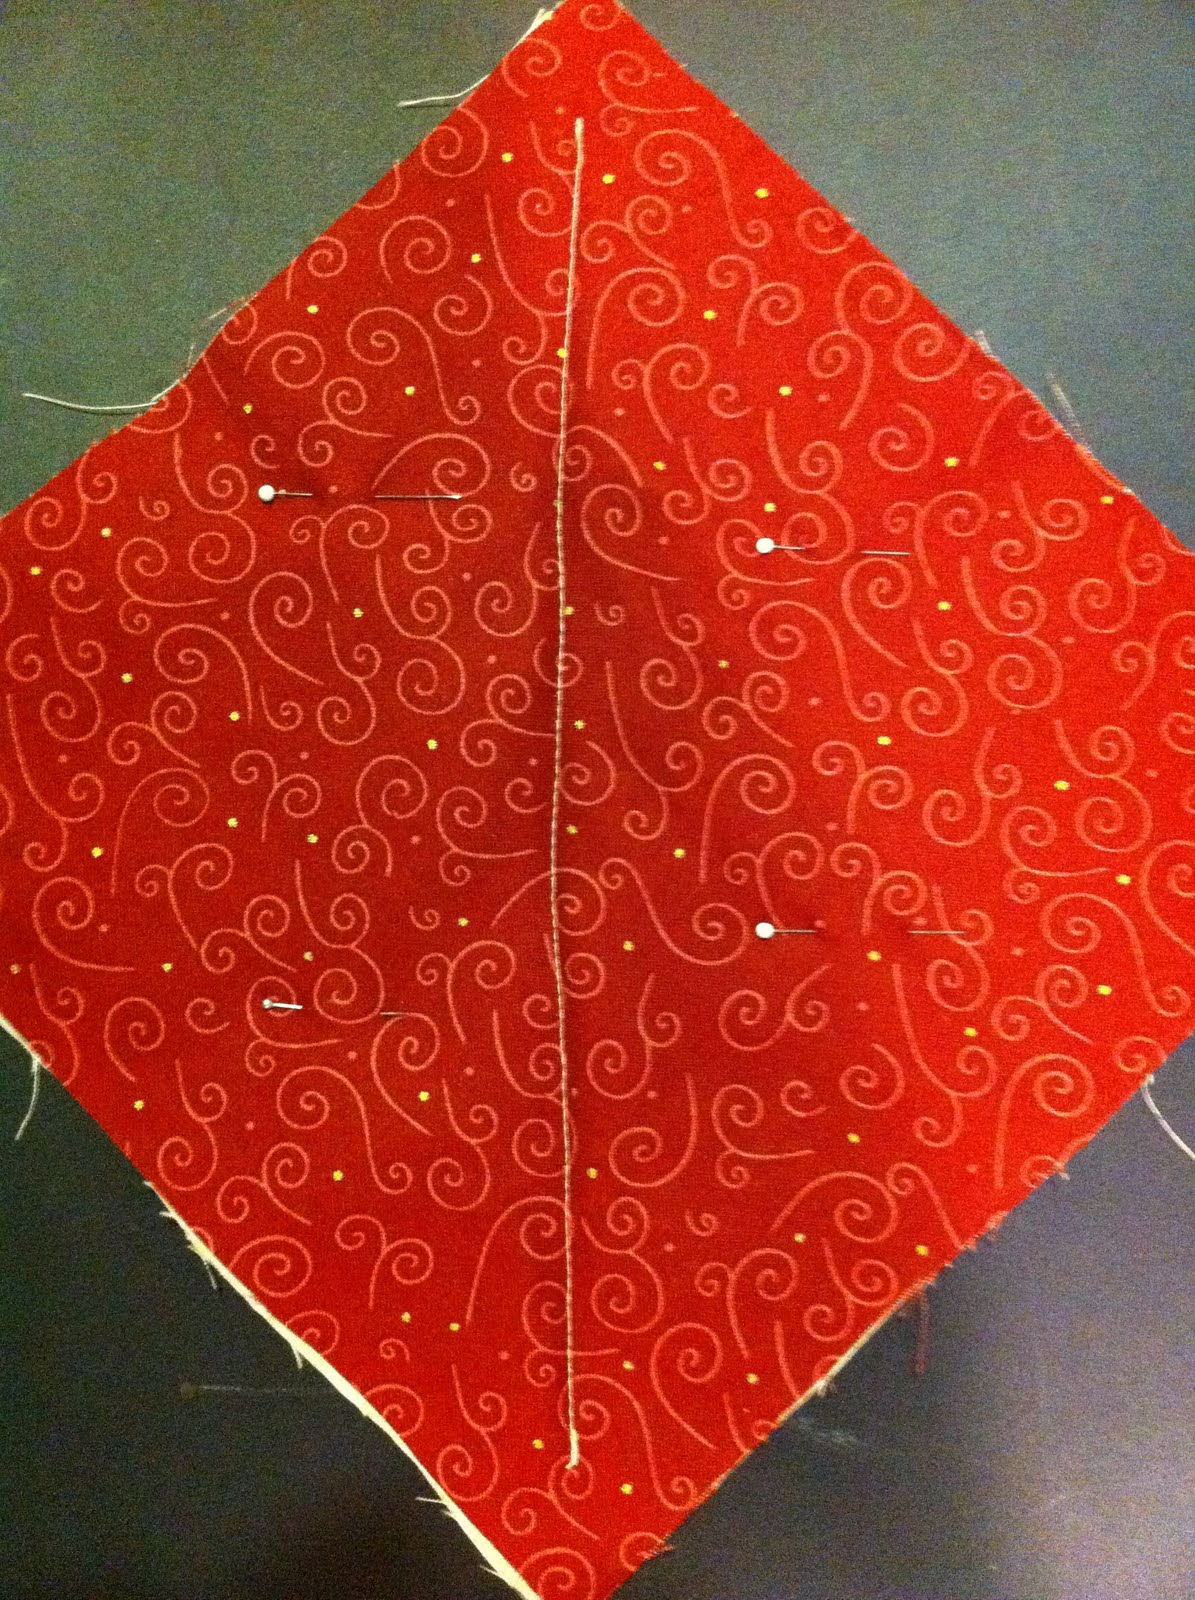
Step 2) Place wrong sides with padding in between.  Pin in place.  Sew a line down the middle.  Leave 1 inch to the outside (In other words, stop sewing when you've reached the end of your padding).

Step 3) Sew more lines on both sides, one inch apart.

Step 4) I made a mini little pocket for mine using some scrap fabric.  I just finished the edge and cut to fit my square pattern.  Then I attached by sewing to top square.

Step 5) Create an edging by folding in each side and then folding again to center.  Use an iron to press.


Step 6) Wrap edging around outside of hot pad.  Pin in place.  Then sew to attach.

Finish with a nice loop.  There you have it, the cutest wedding present for the blushing bride.  I hope she likes it.  I have extra fabric, so I want to make myself one too.

Wednesday, August 24, 2011

Wonder Under is really wonderful


Look at these pillows I made with the magical wonderfulness of Wonder Under! For those of you that don't know, Wonder Under is pretty much an interfacing that acts as an adhesive too. So this is my art work I created on paper, made into a pattern, and cut out of fabric adhered to Wonder Under. Easy way to create your own artwork on fabric.

Thursday, August 4, 2011

I like to plan parties. Well I like planning anything at all.


Here is a banner I made last night. Simplest sewing project ever. All you do is cut triangles out of coordinating fabric. And best news is I can use it as a decoration for multiple parties. Im throwing My friend mandie a birthday party this weekend and I'm creating the cutest table spread you ever saw. Can I switch my career to party planning please? I enjoy it way too much. But I guess with teaching I get to plan too so it's all good.

Wednesday, August 3, 2011

An Idea (Lightbulb)


1) Go to any thrift store
2) Pick out the cutest, girliest plates
3) Pick out a couple candle sticks holders
4) Heat up your glue gun
5) Create something wonderful

I'll show you my plans for this little show stopper in a later post:)

Monday, December 6, 2010

birthday card

 It was my little baby sister's 19th birthday and so me and my mom decided to go visit her up at college.  I wanted to make her a card that was extravagant and silly.  As I was browsing Hobby Lobby's shelves I stumbled upon a card board house form, and I couldn't resist.
It's a Playhouse card with us as little paper dolls!  I told her that now she can play with me whenever she wants ha ha.